Image Map

Monday, August 31, 2015

DIY Idea Book Cover


Hey! So lately I have been making videos to practice some of my film skills and to get better. I made this video to help share some information but also because I haven't actually made a tutorial video before. Please tell me what you think, hope you enjoy!

-Alyssa

Wednesday, August 26, 2015

Self-Limiting : Time and Productivity


 I was reading one of my favorite artist's blog, Lisa Congdon and she posted about how she was going to Hudson, NY for an art retreat . She's always working on her business, so it was a bit of a break. In her post she mentioned one thing that hit pretty hard- time and the anxiety that comes with the freedom of it. Having so much free time that she was anxious about what to do with it or where to start. During the school year I feel stressed but well managed, because I always had deadlines and I was able to get things done productively. However, I feel like with the 3 month freedom of summer vacation, my quality of art almost went down. I felt like I had all the time in the world, but in reality I didn't. "Oh, I can just lounge around on instagram and make my own stuff later," or "I can do my summer reading project tomorrow..." and then it never gets done because I didn't set deadlines for myself. At the beginning of summer I wanted to have set up my Etsy shop ( which I am still working on) but the main thing I wanted to do was get my photography framed and sell some at the local coffee shop. But where am I now? On my computer stressing out about school tomorrow, not selling art at a coffee shop. I had all the time on my hands ; the only thing stopping me was myself. It's really sad when I look back on it- that was my biggest summer goal, but I never really got around to it just because of what was in my head and my outlook on the situation. It's an odd feeling, because you can't go back. Because I can't go back, I'm going to take what I learned from this situation to take my time by the ropes and use it wisely. You always hear about "Whatever would you would have wished you done when you're lying on your deathbed, you should do". And it's true. I'm going to take what I learned from this small-scale of that situation, and learn from it now. Please, don't wait to do what you want to do. I'm going to try to go to get like 3 frames done and maybe, just maybe get stuff prepped to do the coffee shop selling this week, but I have school starting soon. Well, as the amazing Casey Neistat says, "Work Harder, Do more." There's nothing holding you back. I'm going to leave this on a happy note, and not wallow in what I cannot change (past) but move forward and  do what I can do in this moment given to me.


Monday, August 24, 2015

Creative Block

As an individual who likes to indulge in creative activities, I often go through periods of creative block. I never feel a steady flow of "making" things- it always seems like I'm either churning out products or like I'm stagnant. Stagnant times like these really kill my self confidence. Not only do I feel like I can't make anything, but I feel like my skills have drained. It's got to be the worst feeling in the world, but I think what helps is one thing I have been thinking of for a while-
What if creative block was not the lack of creativity and ideas, but rather the overwhelming supply of them? I sometimes look at a blank sheet of paper and I am filled with anxiety. It's not that I can't think of anything at all to put on it, but rather that I can't choose one perfect thing to do with it. I think that creative block might be stemming off of being a perfectionist. I can't choose the perfect photo for a reference, or I can't choose the perfect medium to use. Maybe it's that I think that in the end it may not be worth my time. To get rid of this, I have to get rid of the doubt. The perfection. I need to realize that even if I mess up or "fail" in my own eyes, the process has taught me much more than the final product ever will. I'ts hard to remember, but very important.

Where do you think creative block stems from, and how do you try to cure yours?

-Alyssa

Sunday, August 23, 2015

DIY Geneva Pretzel Cookies

Hey! The loveliest Sophia did a guest post trade with me, and here is what she made! Thank you so much for your time and talent! I hope you guys enjoy. This looks absolutely delicious, pretzels are my favorite! xx
________________________________________________________________________________

Hello! 'Tis I, the frenchiest fry. (No, I did not come up with that line. I'm just not that cool)
But anyway, 'tis I, Sophia from Someplace in the Midst. Thanks so much to Alyssa for letting me come and post this awesome delicious recipe. And also, Alyssa did a lovely post on photography over on my blog that you should check out.

No joke, this is one of the best cookies I've made. It basically tastes like a chocolate cookie, but with the novelty of something new.
The story behind this recipe is that my brothers wanted to make cookies and I wanted to try something new, so I googled "the best cookie recipes in the world." This recipe popped up, but unfortunately we didn't have some of the ingredients so we just improvised. And they basically turned out epically awesome.

And I had never heard about Pepperidge Farm's Geneva cookies until today, but now I'm a firm believer.
They probably sell them at your local grocery store. But making them is a thousand times better and probably cheaper. Carry on.
DIY Geneva Pretzel Cookies
(adapted from this recipe - makes 18-20 cookies)

Ingredients:
1 stick of softened Butter (1/2 cup)
1/2 cup Granulated Sugar
1/2 Tbsp Vanilla
1/2 Tbsp White Vinegar
1/4 tsp Salt
1 tsp Baking Powder
1/8 tsp Baking Soda
1 cup of Flour

1 cup Chocolate Chips
1 cup Pretzels, crushed to small pieces

Directions:
1. Preheat oven to 300 degrees.

2. Cream butter, sugar, vanilla, and vinegar. Add salt, baking powder, baking soda, and flour, mixing just until blended.

3. Roll into 1" balls, flatten on cookie sheet to 1/4 inch thick. (the recipe this was adapted from has some great visuals if you are having a hard time picturing it.)

4 .  Bake for 17-20 minutes, cookies should be lightly browned and firm. Cool completely.

5. Microwave chocolate chips for 30 seconds, stir. Microwave for an additional 30 seconds, continue until smooth.

6. Spread a dallop of chocolate on each cookie, immediately sprinkle with crushed pretzels. Store in airtight container, or just eat them all.

Let me know if you end up trying them!

xo,

Sophia

Monday, August 10, 2015

Trail of Stars

Hello! I was messing around today with different tools in my favorite program, Photoshop. I really enjoy looking at typography, and decided to give it a go. I need more practice with lettering, but I'm certainly having fun with different layers and drop shadows! I hope this is the first of many. It's inspired very roughly by one of my favorite illustrators, Lisa Congdon. I saw her do a poster of this text and wanted to try something myself. I hope you like it!

Digital Illustrations

Hello! Recently I have been working on a series of digital illustrations. I hope to work on making a t shirt line to sell in my future online shop. This is a sneak peek on one of them. I have been using Adobe Photoshop and Adobe Illustrator to help me get to where I want my final product to look like.

They feature bright, fun colors, and funny creative-art themed content. My target audience is fellow artists with a little sense of humor. I couldn't find any art-themed shirts around or online, so I'm planning on making my own. If you're interested please let me know so I can get a feel for what the market would enjoy!

Alyssa

Sunday, August 9, 2015

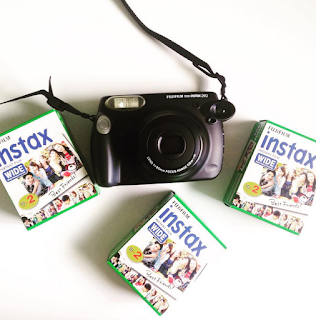
Instax Wide 210 : Review and Sample Photos


Hello! I recently dove in and bought the Instax Wide 210. I have been wanting one of the instax minis, but I thought they were just too small to do the kind of photography that I wanted to do. I bought a "working" polaroid land camera 104 off of ebay, but it didn't actually work and it cost as much as I paid for it to send it back. It's still a lovely little camera (well, large? haha) to take photos of and makes a good prop for photoshoots. You can see in the photo I shot below how simply gorgeous the red is!
Anyways, I stumbled upon the Instax wide from my favorite blogger, Kaylah. I always go to her when I'm trying to find a new camera to buy and play with haha.

I was afraid that the fact the flash doesn't turn off (it's automatic, and turns on whenever it wants to...)
would prohibit me from getting any actual nice photos. All of these photos were taken outside, and many in the shade. I feel like I got really lucky! Maybe it is just luck, but none of my photos came out as total duds.

I was also really surprised how gorgeous the colors were. They had incredible contrast, which I love. The photos I have seen from the Instax mini always seem to be washed out and over-exposed, but always super light and soft-looking. I was stunned by how different these came out. The focus is measured in distance, and you have two modes- .3m-9m, and 9m-infinity. I thought this would be limiting, but my photos never came out too blurry. Everything was relatively sharp.  

Pricing:
For film (which I purchased off of amazon) each picture is 80 cents. (US currency.) Versus .74 cents for an instax mini, it's more expensive at face value for the wide, but the photographs are twice as wide. The camera itself (Instax wide 210) Is 79.99, which is approximately only 10$ more than the mini. I think it's most definitely worth going up a few bucks for such a size difference! I think that if you are into photography, this would be a great instax camera to get. The mini might be better if you are wanting more of a portable, novelty camera for taking cute pictures with friends. This camera is not heavy, but it is incredibly bulky and goofy looking. I love it anyways! Just extra character :)

I have had SO much fun taking this camera with me, and can't wait to show you more photos!